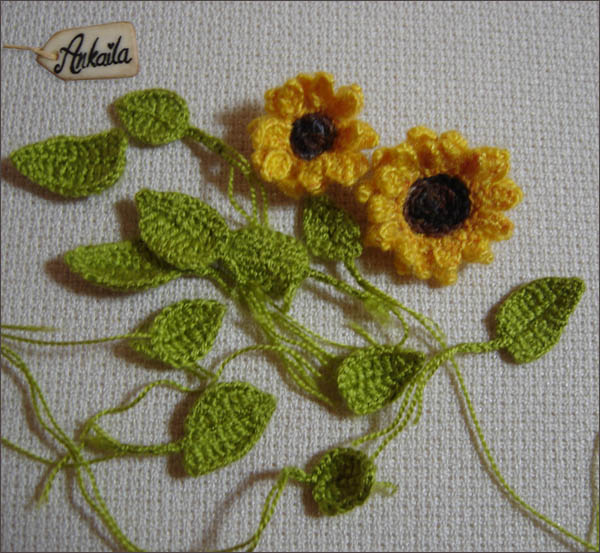
Hello there! Today, even if you don't have experience with 3D embroidery, I've come to share the steps for creating a wonderful brooch using your crochet flowers.
If you're skilled at crafting beautiful crochet flowers, I believe you'll enjoy this project!
The key to making your brooch stylish and unique lies in combining your crochet flowers with a 3D embroidery effect.
By placing them on a felt base with a colorful composition and stitching, you'll create a handmade and impressive accessory.
In this tutorial, I won't go into detail about how to make the flowers. You're already capable of creating lovely flowers.
What I'll guide you through is how to assemble these flowers to turn them into a stunning brooch.
Let's get started!
Firstly, if you have your flowers, leaves, and tiny blossoms ready, we'll need to create the shape of the brooch using a heart pattern. You can easily follow these steps to achieve it.
I needed a heart shape for my brooch. To do this, I folded a magazine page in half. Starting from the folded edge, I drew a half heart shape.
Then, I followed this line and made a cut. When I unfolded the paper, I had a symmetrical and neat heart template on both sides.
I picked cream-toned felt as the background to complement the vibrant flowers. Tracing the heart templates onto the felt, I then carefully cut along the lines with scissors, shaping the forms precisely.
I begin by placing my sunflowers onto the light cream-colored felt that I've cut for the front side. With precision, I sew both sunflowers onto the felt, ensuring the stitches remain hidden from the front, just as depicted in the images.
This way, the stitches are neatly concealed, allowing the sunflowers to elegantly adorn the surface.
I use the remaining yarn from my green crochet leaves to attach them. Passing the needle through the end of the yarn, I easily stitch the leaf to the edge of the flower.
This method allows me to both stitch in the same yarn color for a cohesive look and avoid the need for additional effort to secure or reinforce the leftover yarn ends.
Now it's time for the tiny purple flowers. The combination of yellow and purple will look harmonious. I carefully sew my tiny flowers into place. To add an extra touch, I create seed stitches at the center of each flower using yellow French knots.
I have completed sewing the crocheted flowers onto the front side of the heart-shaped felt.
I'm starting to work on the backside of my brooch. For this part, I'm preparing another heart-shaped felt piece, the same size as the one I used on the front.
This piece is in a slightly darker shade of cream. I'm also cutting another small rectangular piece of felt from the same color.
The length of this small piece should be about half a centimeter shorter than the length of a pin.
I'll be using a safety pin as a brooch fastener. For this, I have a small gold-colored safety pin.
During the process of sewing the safety pin onto the felt, I place a rectangular piece of felt that completely covers the wire stretching between the clasp, also known as the "clasp," and the circular loop.
This additional felt piece allows the clasp and the pointed end that goes into the clasp to move freely, without hindering the opening and closing of the safety pin.
Once the backside of my brooch is complete, I move on to the sewing process of attaching the front and back sides together.
To do this, I position the two pieces on top of each other with their front sides facing upwards.
Firstly, making sure both pieces are stitched securely, I proceed to sew along the edges using a blanket stitch. For this, I'm using cream-colored thread.
Next, I create a decorative stitch along the edge. For this, I use the cast on stitch technique, crafting knots with 5-6 loops each.
Next, I create a decorative stitch along the edge. For this, I use the cast on stitch technique, crafting knots with 5-6 loops each.
These knots form consecutive loops. You can see examples of this in the pictures, can't you?
This meticulous detail adds a charming touch to my brooch, evoking a crochet lace sensation.
I have a few more tutorials on making brooches. If you'd like to see them, you can follow the links below.
Lastly, I complete my brooch by adding a small bird-shaped button, giving it a finishing touch.
Here are the images showcasing the final look of my brooch. I'm pleased with the outcome.
I hope this tutorial serves as an inspirational source for your own projects. That's all for today. Looking forward to meeting you again in a new tutorial.


.jpg)


.jpg)


